DIY Decorated Composition Notebook

So for everyone just starting school, you probably have all those clean, fresh school supplies ready to go. But they’re also probably very generic, and very unpersonalized. Decorating your notebooks in a more personalized way is so easy, so why not do it?

Materials:
-Composition Notebook
-Scrapbook Paper
-Index Card
-Washi/decorative tape
-White Glue
-Sharpies, Stickers, or any other decorative items

1. Trace any tag shape on the index card and cover with strips of washi tape. You could also just cut a shape out of scrapbook paper. This is the area you can write your name, class period, etc.

Composition Notebook Tag Finished Comp Notebook Tag

2. Trace the front and back covers of the notebook onto the back of the paper you want, and cut it out.

3. Glue the paper to the covers and trim any excess paper.

4. Lastly, glue your tag on, and tape over the spine with washi tape. Decorate further however you want.

Decorated Composition Notebook

I’m so happy with how my english notebook turned out! This is the front, and the back matches with yellow paper with white polka dots 🙂 So cute!

I’d love to see any designs you guys make- email me or send them to me on Pinterest! 🙂

Love, Holly

DIY Washi Tape Phone Case

Here’s a quick, easy DIY that’s perfect for a gift! Everyone needs new phone cases, right?

Materials:
-Plain white phone case
-Washi tape of your choice
-Craft knife & cutting surface)
-Mod Podge
-Stickers, gems,  or other things for decoration

1. Put strips of washi tape straight onto the case, slightly bigger than the case. Be sure everything is lined up, and leave the wash tape edges hanging free on the top and bottom.

2. In the best angle you can get, trim off the excess washi tape with the craft knife. When you get to hard-to-reach places like the volume area, the same process applies, it just takes a little longer.

Trim Washi Tape Case

3. Put any additional decorations straight on the washi tape, unless it’s something that needs more preparation (in which case, do that).

4. Once everything is how you want it, paint 2-3 thin layers of Mod Podge over it to help it last longer. I only used one layer, but would definitely recommend more!

Finished Washi Tape Case

That’s it! What craft trends are you interested in now? I LOVE the gold, which I tried to incorporate through the stickers on this case. 🙂

Also, guys please comment on this: Do you like reading these easy DIYs, or would you rather all of my crafting posts be more difficult?

Love, Holly

DIY Magnets

Here’s another SUPER easy DIY. More to give you inspiration than tell you how to do it. You can really make a magnet out of almost anything- shells and corks, like in my picture, beads, charms, rocks, whatever!

DIY Magnets

All you need is:
-craft magnets (these are super strong!)
-Hot glue
-Acrylic Paint (metallic is fabulous)
-Washi Tape
-Glitter
-Shells, Corks, etc. to be the focal point of your magnet

Seriously, all you do is decorate and prepare your focal point by painting it, covering it in wash tape, etc. Then, hot glue it to the magnet. Wow. So. Hard. Right? 😉

I hope this post kinda inspired you to just do a simple craft this week, whether it be for a birthday or other occasion, or just because!

Love, Holly

Darby Smart!

How cute is the box?!

How cute is the box?!

If you go to my “Fun Stuff” page, you’ll see a link to Darby Smart. I made a comment there about their blog and also their monthly craft box, “To DIY For.” I finally decided that a 6 month subscription to the box is worth $100, so I subscribed and began my agonizingly eager wait for my first box. It came mid-March, coincidentally, the same time my violin was delivered! So much excitement! So much anxiety over which box to open first!

Anyway, I opened my first “To DIY For” box aaaanddd… yarn. and needles. and plastic. Umm, can you say anticlimactic? I know, I know, some of you may be super into harm crafts, but it just wasn’t anything fancy, ya know? In fact, my box was missing the postcard that has the password to unlock online instructions. “Needle”ss (XD) to say, I was extremely confused and slightly disappointed, so I contacted Darby Smart. They were extremely helpful and gave me the password and directed my to the right site. Once I saw the instructions with pictures, my excitement shot up again! The March project was a needlepoint sunglasses case! And look how cute it turned out!

Contents of March's box

Contents of March’s box

Finished March project

Finished March project

April’s was even better! The first thing I saw was the postcard that said, in big letters, PERFUME. Make my own perfume? Um, yes, duh! In this box, I received two gorgeous glass bottles (I decorated them later), three fragrance oils, a base oil, and a dropper. In short, Darby Smart gives you everything you need to make amazing projects every month! They always give more than enough, so you end up with extra materials to make your own thing!

Materials for April's To DIY For box

Materials for April’s To DIY For box

Perfume Bottles

My finished April projects!

If you have $100 to spend, I would totally say spend it on a Darby Smart To DIY For subscription! It is a surprise, though, so the suspense is killer!

Signature

 I was not paid to write this post. All opinions are entirely my own. 🙂

The Best Things in Life are Handmade

Since I’m a crafter, I suppose I’m biased, but who doesn’t love getting a gift that your friend made for you?

It’s unique. It’s meaningful. It’s personal.

And who doesn’t love that feeling when you make a gift for your friend and they absolutely love it?

It’s warm, fuzzy, uplifting, just plain lovely.

There’s just something about making things with my own two hands that makes me giddy and proud, relaxed and peaceful. It pretty much is the best feeling in life. 🙂

So why not print out “handmade by…” tags so everyone can know the love you put into your projects? I’ve created 14 free, lovely tags that you can print out, cut out, sign, decorate, whatever! Download all of them here!

Signature

DIY: Tie-Dye Watercolor Easter Bow

Yeah. I got excited with the title. How about “The Most Amazingest Tie-Dye Watercolor Bright Easter Bow Ever” is that better? I like that one better. It’s more descriptive because this DIY is one of my favorites to date!

TieDye Easter Bow

I’ve tried many different ways to make hair bows. They’re all okay, but I just decided to do my own thing today, and it came out AMAZING! (with everyone making bows out there, I’m probably not the first one to do it this way, but whatevs…)

Materials:
-Piece of fabric about 5″x6″
-Two pieces of ribbon
-Fabric glue
-Hot glue or Super Glue
-Anti fraying glue stuff
-Alligator Clip
-Sharpies (I know those are fabric markers in the pic, but you need Sharpies!)
-Rubbing Alcohol
-Qtips and paper towels

Bow Process

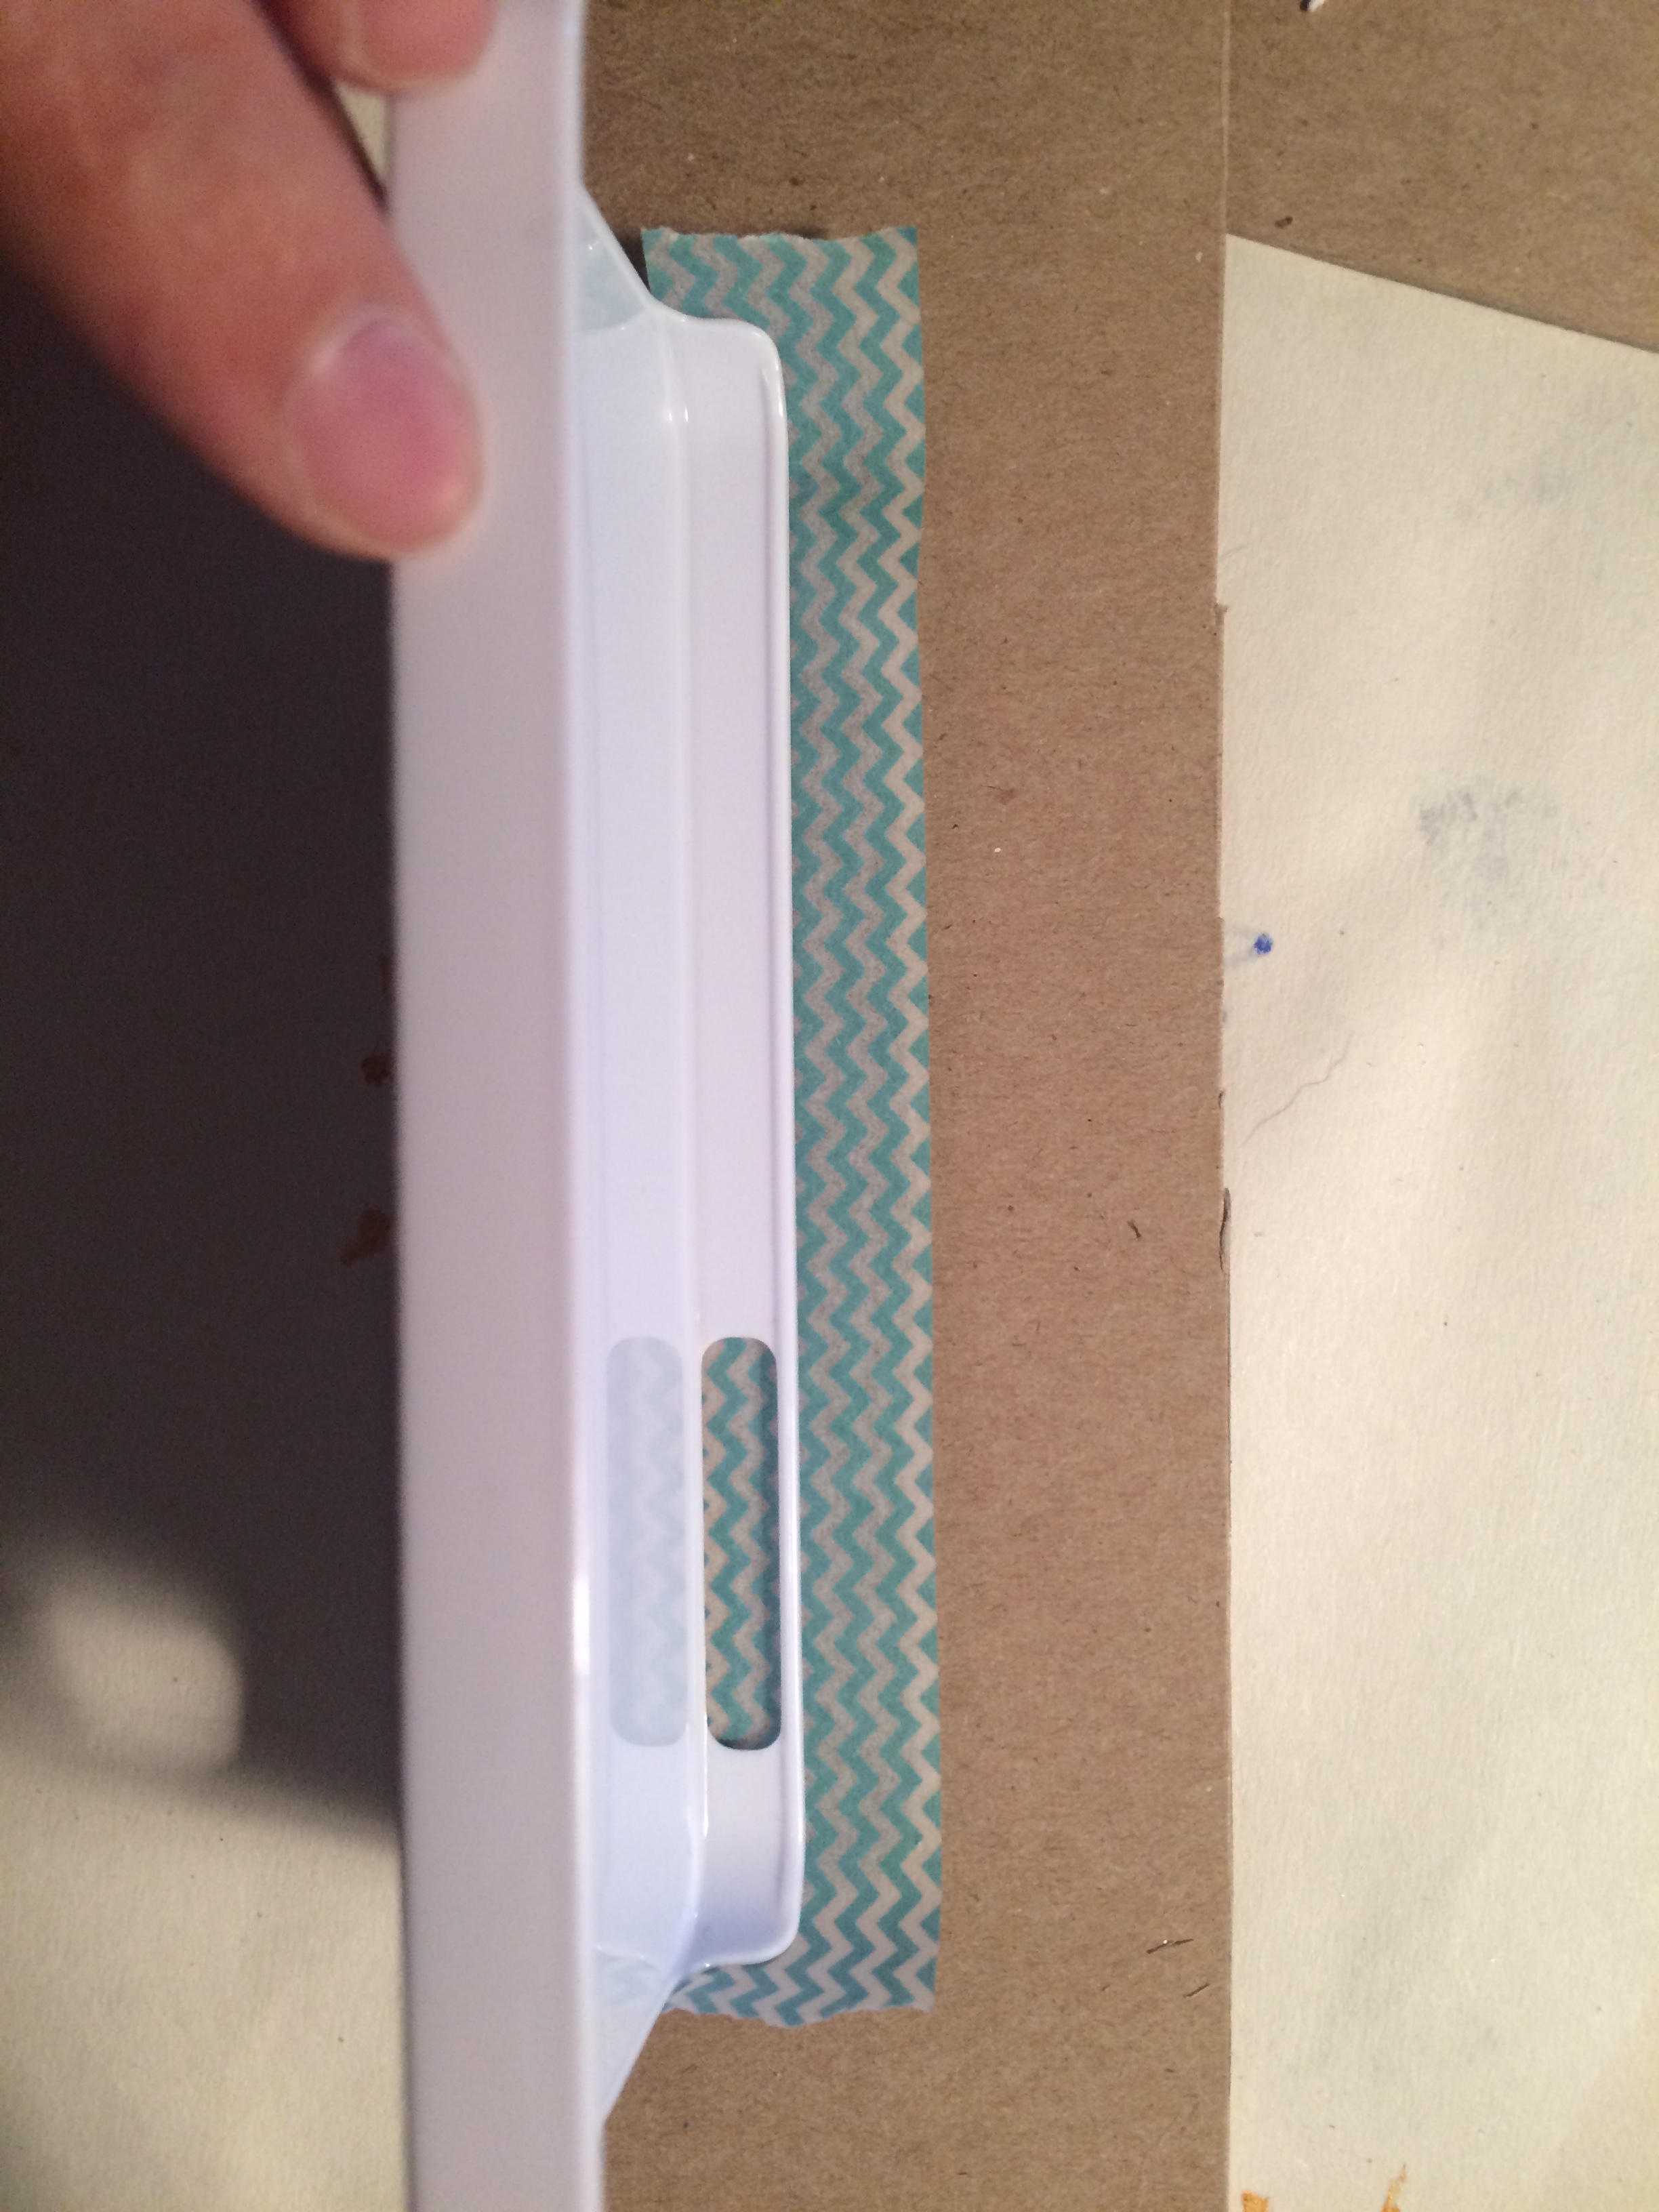
1. Wrap and glue one of the ribbon pieces around the alligator clip, like in the second picture. It should still be able to function normally.

2. Scribble on the fabric with your Sharpies. Leave a little room around different colors because the ink will bleed in the next step.

3. Lay your fabric on top of a paper towel. Soak Qtips in rubbing alcohol and rub all over the scribbled Sharpie areas. The longer you let the rubbing alcohol stay on the fabric, the more the ink will spread. When you’re happy with the design, rinse gently in cold water and let dry.

4. Once the fabric is dry, turn the fabric good-side down. Use fabric glue to glue the short sides about 1/2″ in, and the long sides about 1″ in. Look at the fifth picture.

*tip: apply glue just to the edges of the fabric so when it’s folded, the folded edge is puffy and free 🙂 it will give the bow better shape!*

5. Determine where the half-line is lengthwise, and fold and glue the top and bottom to meet in the middle.

6. Accordion fold the middle to create a bow shape. You may need to play with it a bit to get the shape you want. Once you’re happy, sneak a little fabric glue into the center folds so it lasts longer.

7. Glue an end of the second piece of ribbon to the center of the bow and wrap the ribbon around twice. With the same piece of ribbon, wrap around the bow and alligator clip together twice, then cut the ribbon and apply your anti-fraying glue stuff. Use fabric glue to secure the ribbon that holds the bow and clip together.

Tie-Dye Easter Bow

Ta-daaa! The folded edges and extra support of the fabric glue make this bow magnificently bow-shaped and amazing!!! I can’t wait for this bow’s debut on Sunday and to make  more bows like this!

Remember, if you like DIYs like this, follow the blog and subscribe! The new month is almost here, and that means… *royal trumpeting sound* a FREE FONT for subscribers!!!

What’s your favorite Easter craft? And most importantly, I want to wish you and your family a very happy and joyous early Easter!!!

Signature