DIY Decorated Composition Notebook

So for everyone just starting school, you probably have all those clean, fresh school supplies ready to go. But they’re also probably very generic, and very unpersonalized. Decorating your notebooks in a more personalized way is so easy, so why not do it?

Materials:
-Composition Notebook
-Scrapbook Paper
-Index Card
-Washi/decorative tape
-White Glue
-Sharpies, Stickers, or any other decorative items

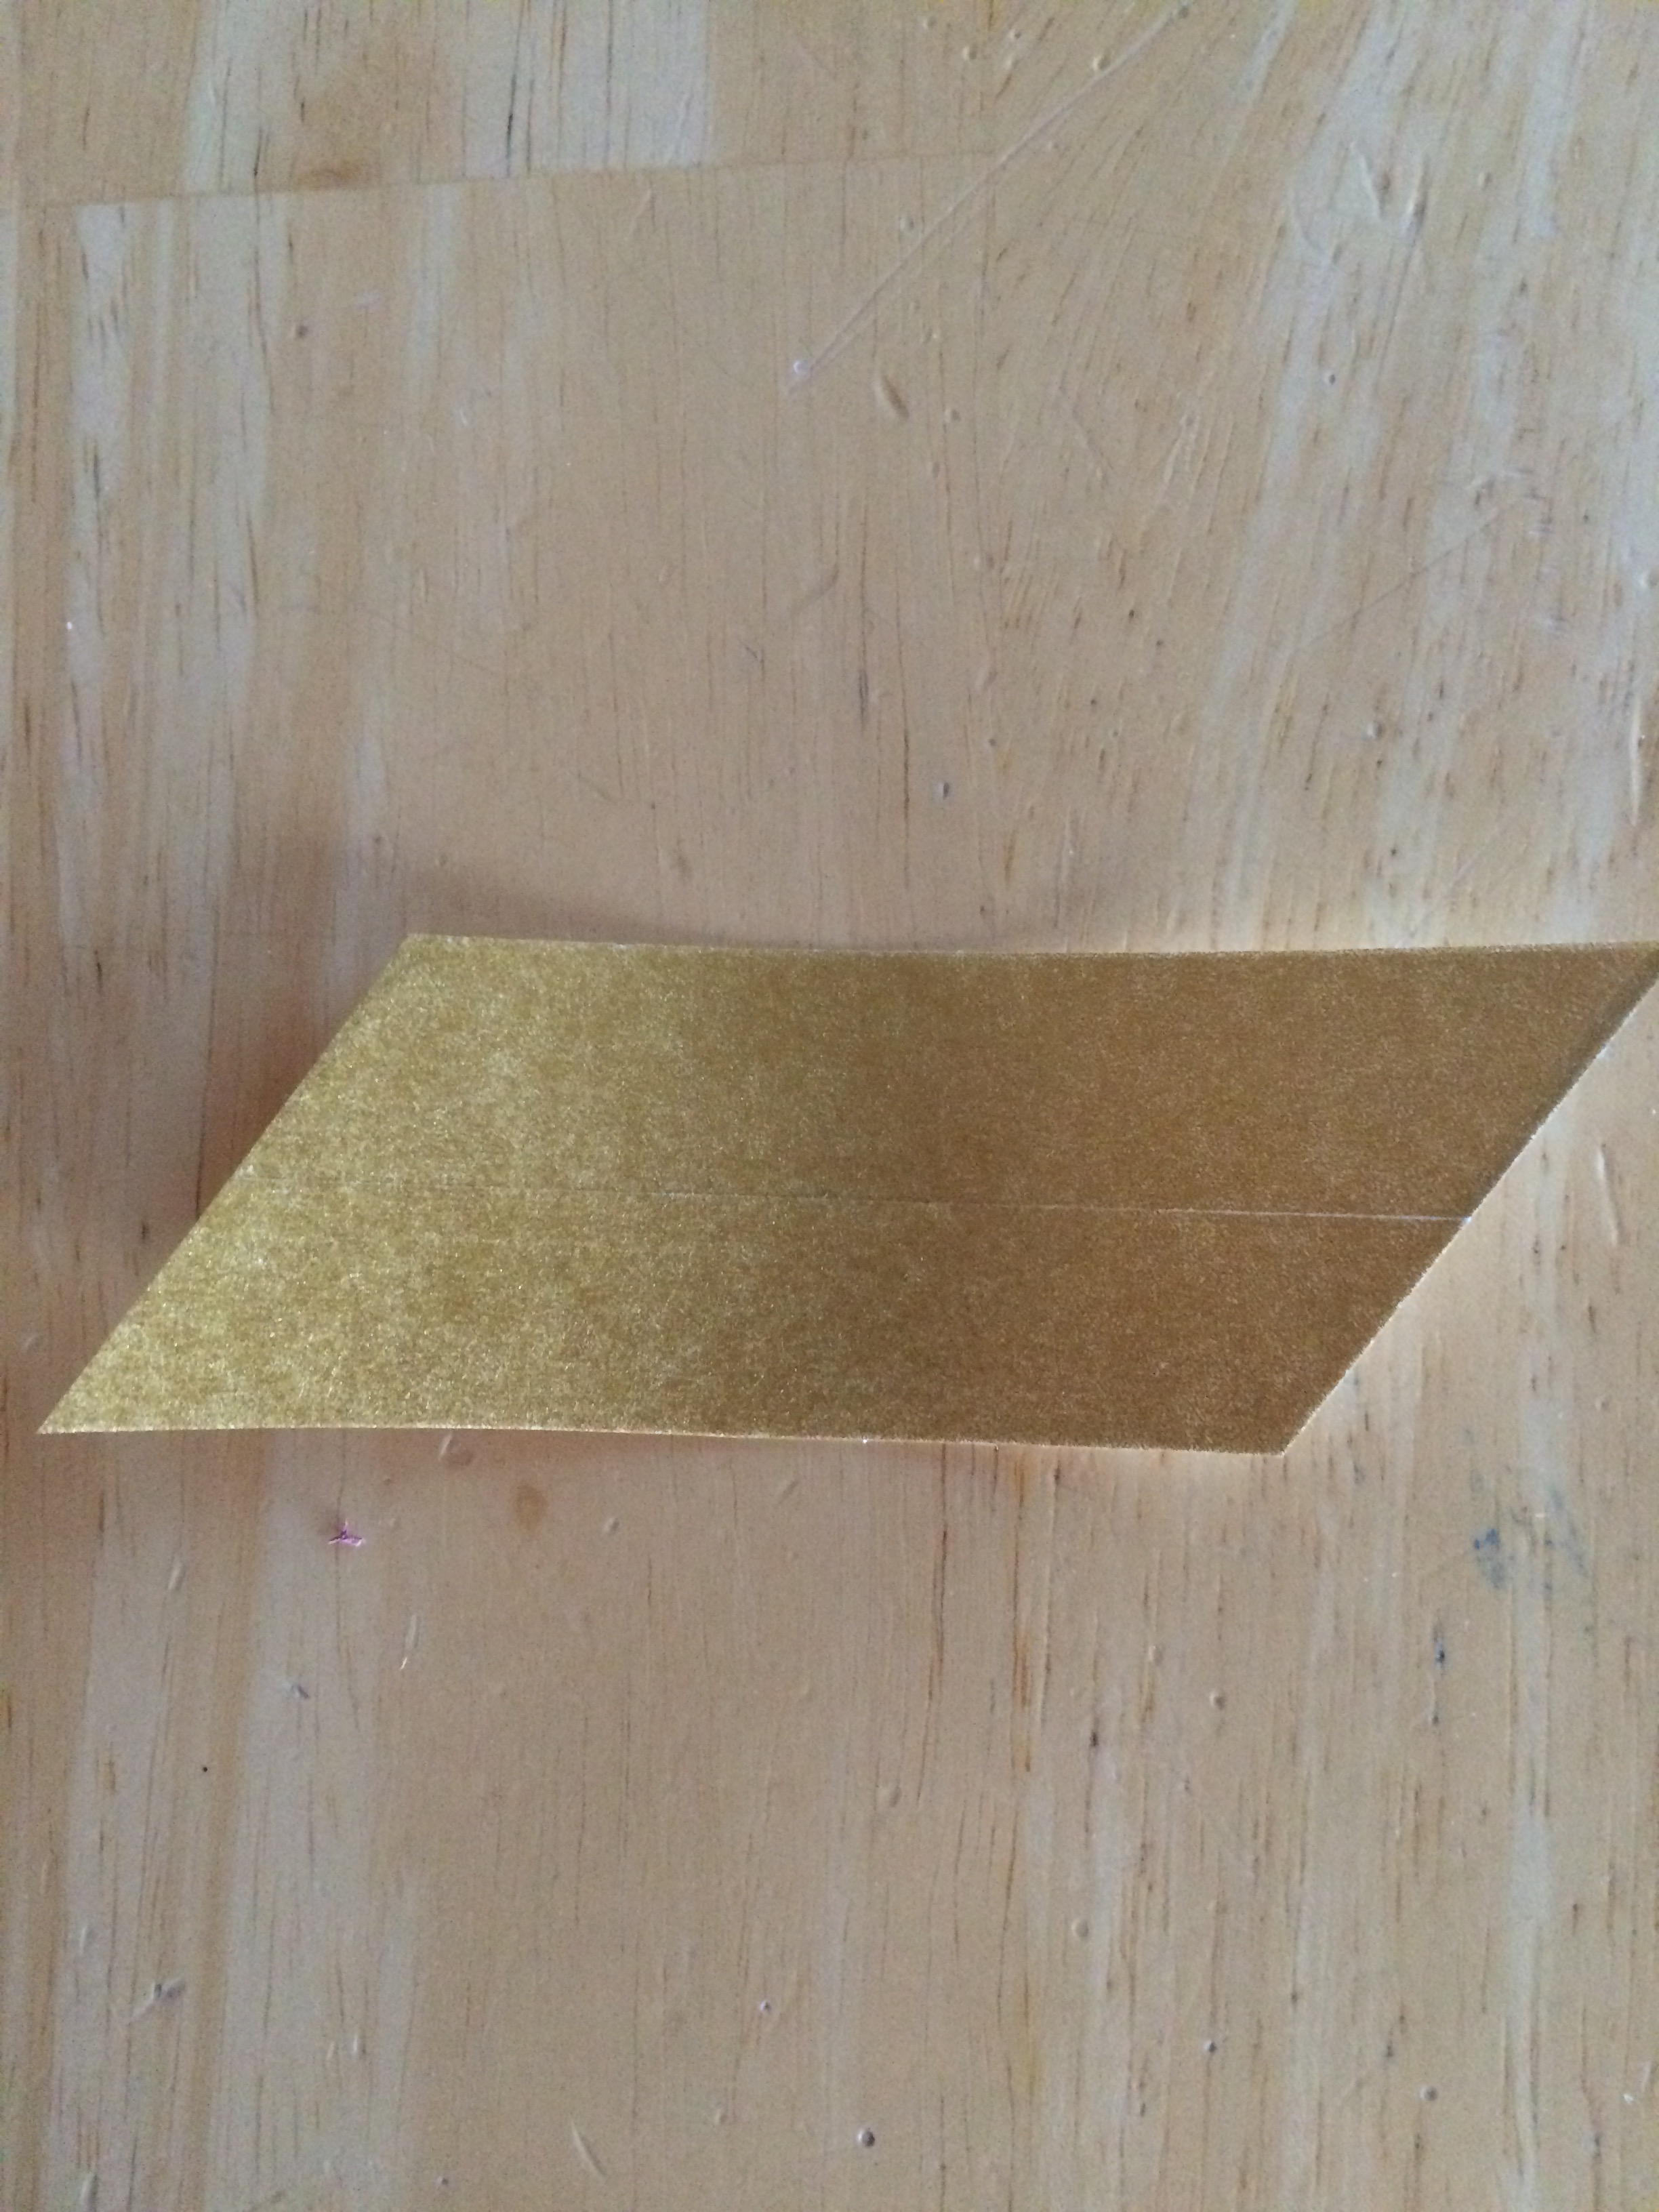
1. Trace any tag shape on the index card and cover with strips of washi tape. You could also just cut a shape out of scrapbook paper. This is the area you can write your name, class period, etc.

Composition Notebook Tag Finished Comp Notebook Tag

2. Trace the front and back covers of the notebook onto the back of the paper you want, and cut it out.

3. Glue the paper to the covers and trim any excess paper.

4. Lastly, glue your tag on, and tape over the spine with washi tape. Decorate further however you want.

Decorated Composition Notebook

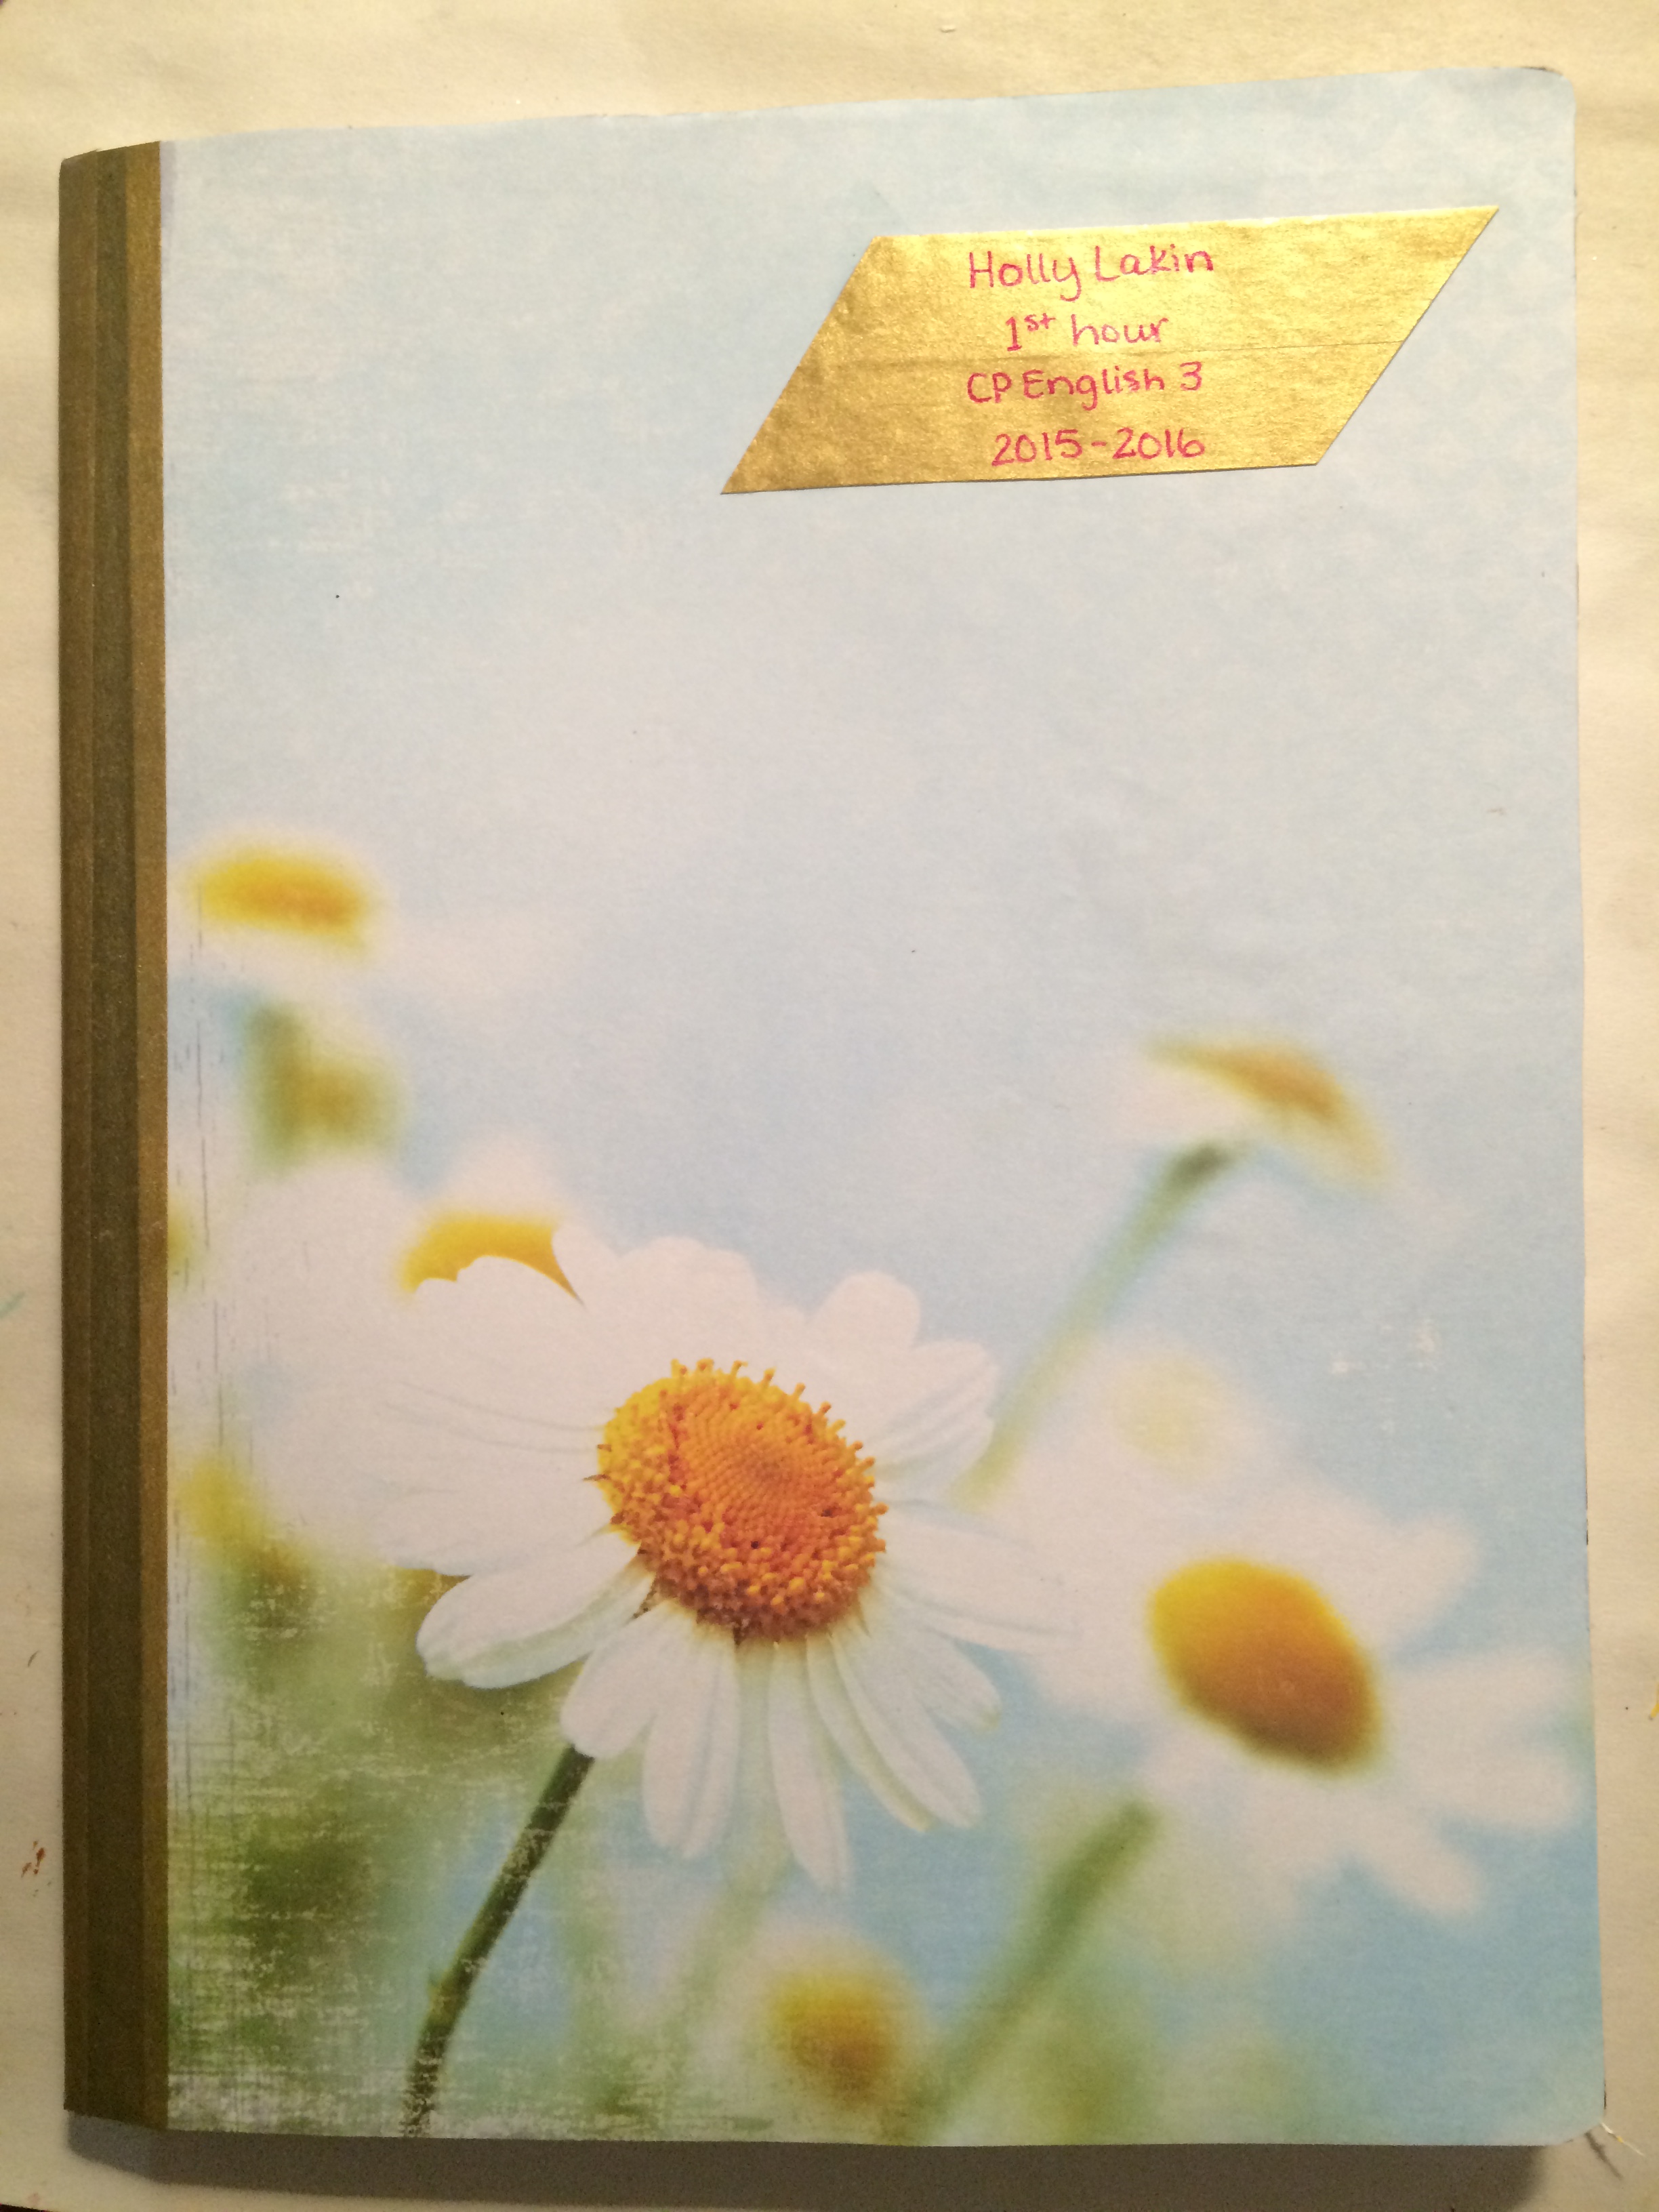
I’m so happy with how my english notebook turned out! This is the front, and the back matches with yellow paper with white polka dots 🙂 So cute!

I’d love to see any designs you guys make- email me or send them to me on Pinterest! 🙂

Love, Holly

DIY Washi Tape Phone Case

Here’s a quick, easy DIY that’s perfect for a gift! Everyone needs new phone cases, right?

Materials:
-Plain white phone case
-Washi tape of your choice
-Craft knife & cutting surface)
-Mod Podge
-Stickers, gems,  or other things for decoration

1. Put strips of washi tape straight onto the case, slightly bigger than the case. Be sure everything is lined up, and leave the wash tape edges hanging free on the top and bottom.

2. In the best angle you can get, trim off the excess washi tape with the craft knife. When you get to hard-to-reach places like the volume area, the same process applies, it just takes a little longer.

Trim Washi Tape Case

3. Put any additional decorations straight on the washi tape, unless it’s something that needs more preparation (in which case, do that).

4. Once everything is how you want it, paint 2-3 thin layers of Mod Podge over it to help it last longer. I only used one layer, but would definitely recommend more!

Finished Washi Tape Case

That’s it! What craft trends are you interested in now? I LOVE the gold, which I tried to incorporate through the stickers on this case. 🙂

Also, guys please comment on this: Do you like reading these easy DIYs, or would you rather all of my crafting posts be more difficult?

Love, Holly

DIY Magnets

Here’s another SUPER easy DIY. More to give you inspiration than tell you how to do it. You can really make a magnet out of almost anything- shells and corks, like in my picture, beads, charms, rocks, whatever!

DIY Magnets

All you need is:
-craft magnets (these are super strong!)
-Hot glue
-Acrylic Paint (metallic is fabulous)
-Washi Tape
-Glitter
-Shells, Corks, etc. to be the focal point of your magnet

Seriously, all you do is decorate and prepare your focal point by painting it, covering it in wash tape, etc. Then, hot glue it to the magnet. Wow. So. Hard. Right? 😉

I hope this post kinda inspired you to just do a simple craft this week, whether it be for a birthday or other occasion, or just because!

Love, Holly

The Best Things in Life are Handmade

Since I’m a crafter, I suppose I’m biased, but who doesn’t love getting a gift that your friend made for you?

It’s unique. It’s meaningful. It’s personal.

And who doesn’t love that feeling when you make a gift for your friend and they absolutely love it?

It’s warm, fuzzy, uplifting, just plain lovely.

There’s just something about making things with my own two hands that makes me giddy and proud, relaxed and peaceful. It pretty much is the best feeling in life. 🙂

So why not print out “handmade by…” tags so everyone can know the love you put into your projects? I’ve created 14 free, lovely tags that you can print out, cut out, sign, decorate, whatever! Download all of them here!

Signature